Key takeaways
- Thermal Grizzly Kryonaut: top-tier performance, a long-time enthusiast favorite for cool running.
- Noctua NT-H2: excellent, forgiving, non-conductive, and easy to apply cleanly.
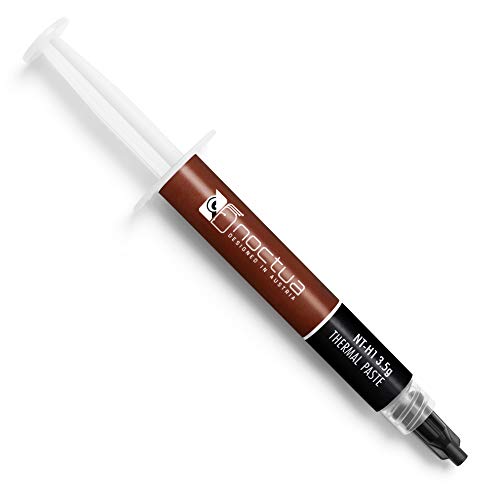
- Noctua NT-H1: proven, reliable, and budget-friendly for everyday builds.
- Thermalright TF4: strong value performer for the price-conscious.
Thermal paste is the thin layer of compound that bridges the microscopic gaps between your CPU’s heat spreader and the cooler sitting on top of it. Get it right and heat flows efficiently away from the chip; get it wrong and you can add 10-15°C or, in the worst case, leave air pockets that cause throttling. Despite the intimidation factor, applying thermal paste is a two-minute job that any gamer can do, and it’s often the single fix a hot, aging PC needs.
This guide walks through the whole process: removing the old paste, choosing a good compound, applying the right amount, and mounting the cooler for even contact. Premium pastes like Thermal Grizzly Kryonaut or Noctua NT-H2 outperform the stock compound on budget coolers by several degrees, so this is a cheap, high-impact upgrade.
Our top picks




As an Amazon Associate we earn from qualifying purchases at no extra cost to you. Ratings are shown as listed on Amazon.
⚡ Save on Your Next PC — Amazon Prime
Prime members get fast free shipping on the systems above, plus early access to Prime Day & Black Friday PC deals. New members get a 30-day free trial.
Watch: How to Apply Thermal Paste Correctly — Video Review
Remove the Old Paste Completely
Old paste must come off before new paste goes on, or you’ll trap air and grit. Detach the cooler, and if it resists, run a stress test for a minute to warm and soften the paste first, then twist gently rather than pulling straight up. Wipe the bulk away with a paper towel, then finish with a lint-free cloth or coffee filter dampened in 90%+ isopropyl alcohol until both the CPU and cooler base are mirror-clean and dry.
Choose the Right Compound
Not all paste is equal, and the right choice depends on your needs. For gaming rigs, a quality non-conductive paste is the safe, high-performing default.
- Thermal Grizzly Kryonaut: top-tier performance, a long-time enthusiast favorite for cool running.
- Noctua NT-H2: excellent, forgiving, non-conductive, and easy to apply cleanly.
- Noctua NT-H1: proven, reliable, and budget-friendly for everyday builds.
- Thermalright TF4: strong value performer for the price-conscious.
Apply the Correct Amount
The number-one mistake is using too much. You want a pea-sized dot in the center of the CPU, roughly 4-5mm across. When the cooler clamps down, the pressure spreads that dot into a thin, even layer covering the die. For larger chips like Intel’s LGA 1700 or AMD’s Threadripper, a slightly larger dot or a thin line works better because the surface area is bigger. Excess paste doesn’t cool better; it oozes over the edges and can act as an insulator.
Mount the Cooler Evenly
Lower the cooler straight down onto the paste without sliding it, which prevents air bubbles and streaking. Then tighten the mounting screws in a diagonal cross pattern, a little at a time, so pressure builds evenly across all four corners. Uneven tightening tilts the cooler, leaving one side of the chip poorly contacted and running hot. Snug is enough; don’t crank the screws past their stopping point.
Verify Your Results
After reassembly, boot up and run a monitoring tool alongside a short stress test. A correctly applied paste job on a clean surface should show stable load temps well below the throttle point. If temperatures are unexpectedly high or one core reads much hotter than the others, the cooler may be tilted or under-pressured, so remount it. Note that fresh paste needs a few hours of use to fully settle, after which temps often improve another degree or two.
Tips
- Never reuse paste; once the seal breaks, apply fresh compound.
- Keep conductive metal pastes away from beginners; a non-conductive paste won’t short anything if it slips.
- Apply in a warm room; cold paste is stiff and spreads unevenly.
- Store the tube tightly capped so it doesn’t dry out between uses.
Frequently Asked Questions
How much thermal paste should I use?
A single pea-sized dot in the center for most CPUs. The cooler’s clamping pressure spreads it perfectly. Too much is a common error that hurts performance and creates mess.
Do I need to spread the paste manually?
Usually no. The dot method lets mounting pressure spread it evenly and avoids air bubbles. Manual spreading with an applicator is optional and mainly useful on very large CPU surfaces.
How long does thermal paste last?
Two to four years for most compounds. Premium pastes like Kryonaut and NT-H2 hold up on the longer end. Replace it if you notice temperatures gradually climbing over time.
Is thermal paste conductive and dangerous?
Most consumer pastes like Noctua’s are non-conductive and safe if a little slips onto the board. Liquid-metal compounds are electrically conductive and should only be used by experienced builders who mask surrounding areas.
Conclusion
Applying thermal paste is one of the easiest, most cost-effective ways to tame a hot CPU. Clean both surfaces thoroughly, choose a quality non-conductive compound like Kryonaut or NT-H2, place a single pea-sized dot, and mount the cooler evenly in a cross pattern. Verify with a quick stress test, and you’ll often gain back the exact thermal headroom that was causing your throttling and stutter.