A good best fan curve for gaming PC setup balances cooling, noise, and airflow instead of running every fan at maximum speed. The right configuration keeps temperatures under control during demanding games while avoiding unnecessary noise at idle. This guide explains practical starting settings, BIOS configuration, and safe adjustments.
What the Best Fan Curve for a Gaming PC Really Comes Down To
The best fan curve depends on your processor, graphics card, cooler, case airflow, and noise preferences. There is no universal percentage that works for every build. A sensible starting point keeps fans relatively slow at low temperatures, increases their speed as heat builds, and allows full cooling capacity when sustained workloads require it.
1. Understand How a PC Fan Curve Works
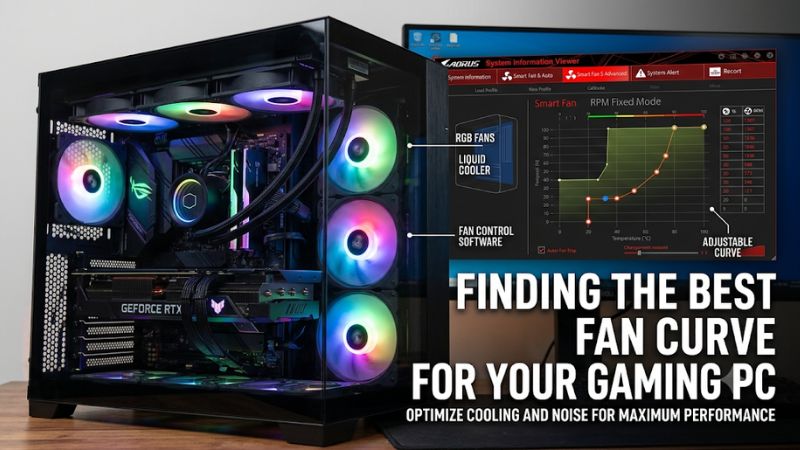
A fan curve connects temperature readings to fan speed. The horizontal axis usually represents temperature in degrees Celsius, while the vertical axis represents fan speed as a percentage of maximum RPM. As the monitored component gets hotter, the controller increases fan speed according to the configured points.
A flat section creates quieter operation across a temperature range, while a steeper section increases cooling more aggressively. For gaming, a gradual idle-to-load transition is generally preferable to an abrupt jump. Remember that 50% PWM does not necessarily mean 50% of a fan’s measured airflow or cooling performance.
2. Choose the Correct Temperature Sensor
CPU cooler fans should normally respond to CPU temperature because their primary job is removing heat from the processor. A CPU package or core temperature reading can react quickly when a game or background application increases processor activity. Follow the motherboard’s available sensor options rather than assuming every BIOS uses identical labels.
Case fans have a different responsibility: moving cool air through the chassis and exhausting heat from the CPU and GPU. During graphics-intensive games, the GPU can produce substantial heat even when CPU temperatures remain moderate. A controller that supports a combined CPU/GPU temperature source can therefore provide better gaming airflow than a CPU-only sensor.
3. Balance Cooling, Noise, and Response Time
Higher fan speeds generally increase airflow but also create more noise. Running every fan aggressively at idle wastes much of the opportunity for a quieter desktop experience. Instead, establish a low-speed operating range and increase the fan response when temperatures rise during sustained gaming.
Temperature spikes can also make fans repeatedly accelerate and slow down. This behavior is sometimes called fan hunting or ramping. BIOS options such as temperature interval, hysteresis, and step-up or step-down time help smooth the response. Their exact names and available controls depend on the motherboard and fan controller.
What Doesn’t Help
Setting every fan to 100% is not automatically the best cooling strategy. It can increase noise without addressing poor airflow, obstructed filters, incorrect fan orientation, or an undersized cooler. A faster fan cannot compensate for every physical cooling problem.
Likewise, copying another PC owner’s fan percentages without considering the actual fan model, temperature sensor, and hardware configuration can produce disappointing results. A curve should be treated as a starting configuration, not a universal thermal standard.
How to Set the Best Fan Curve for Gaming PC: Step by Step
Once you understand which fans cool each component, configure them individually rather than applying one profile to the entire system. Start with the motherboard’s BIOS for CPU and case fans, then use compatible graphics-card software if you need a separate GPU curve. Record your original settings before making changes.
1. Configure the CPU Fan Curve in BIOS
Restart your desktop and enter the BIOS or UEFI setup, usually by pressing Delete or F2 during startup. Find the fan-control section. Depending on the motherboard, it may be called ASUS Q-Fan Control, MSI Hardware Monitor, Gigabyte Smart Fan, or ASRock FAN-Tastic Tuning.
Select the CPU_FAN header and check its control mode. Use PWM for a compatible four-pin fan and DC for a three-pin fan. Auto detection is suitable when the motherboard correctly identifies the connection. Begin with a gradual curve, then adjust it after checking CPU temperatures during gaming.
2. Set Up Case Fans for Gaming Airflow
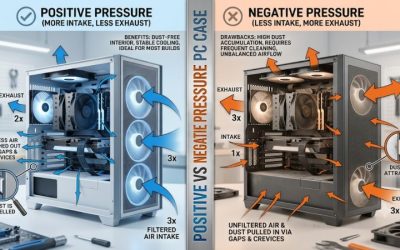
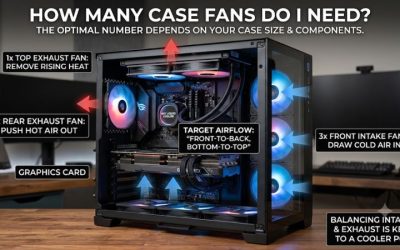
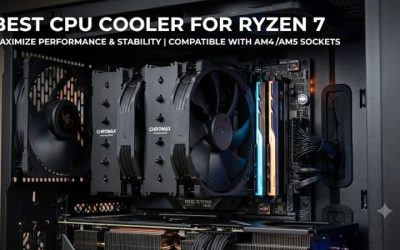
Case fans should help bring cool air into the chassis and move heated air out. A common arrangement uses front or bottom intake fans and rear or top exhaust fans, although the correct layout depends on the case and radiator installation. Check the airflow arrows printed on each fan before changing its orientation.
If your motherboard supports multiple temperature sources, consider using a combined CPU/GPU sensor for case fans. This helps airflow respond when the graphics card produces more heat than the processor. If BIOS cannot read GPU temperature, compatible Windows fan-control software may provide that functionality.
3. Adjust the GPU Fan Curve
Graphics cards often have their own automatic cooling profiles. If the default profile produces excessive noise or allows temperatures to rise more than you prefer, a custom curve may help. MSI Afterburner provides a user-defined automatic fan-control option under Settings and the Fan tab.
Enable the custom control option, adjust the temperature and fan-speed points, and select Apply. Keep the card’s zero-RPM behavior if supported and desired. Do not assume every GPU responds identically to the same percentage. Fan design, heatsink size, firmware, and graphics-card power limits all affect the result.
4. Tune Fan Response and Test the Configuration
After setting the initial curve, check whether your motherboard offers fan response-time or temperature-interval controls. A small delay can prevent fans from reacting dramatically to brief CPU temperature fluctuations. Avoid making the response so slow that fans cannot increase speed during sustained workloads.
Run a demanding game and monitor CPU and GPU temperatures, fan RPM, and noise. Allow enough time for the system to reach a relatively stable temperature. If temperatures continue rising, increase the relevant fan speeds or investigate airflow and cooler installation. If the system stays comfortably within its hardware limits, try reducing unnecessary fan speed.
Recommended Starting Settings
The following values are illustrative starting points for desktop gaming PCs, not manufacturer-mandated settings. Adjust them according to the actual fan’s minimum operating speed, cooling hardware, and component temperature limits.
| Setting or Step | Where | Effect | Risk |
| CPU fan: 30% at 40°C, 50% at 60°C, 75% at 75°C, 100% at 85°C | BIOS CPU_FAN | Gradually increases processor cooling | Too-low minimum speed can stall some fans |
| Case fans: 30% at 40°C, 45% at 55°C, 65% at 70°C, 100% at 80°C | BIOS or fan-control software | Increases chassis airflow as temperatures rise | CPU-only sensing may overlook GPU heat |
| GPU fans: retain automatic control or create a gradual custom curve | GPU software | Adjusts graphics-card cooling response | Aggressive settings increase noise |
| Fan response delay: approximately 3–5 seconds if supported | BIOS or fan-control software | Reduces unnecessary speed fluctuations | Excessive delay can slow cooling response |
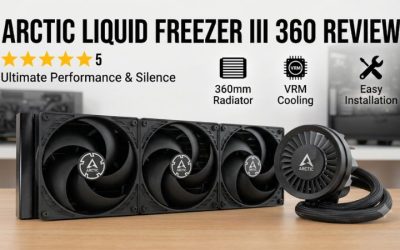
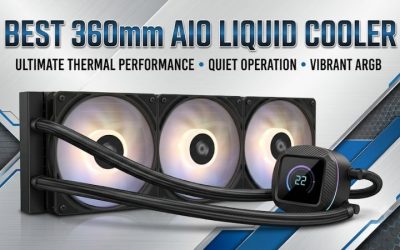
These percentages are starting values, not guaranteed operating points. Some fans cannot reliably run at 30%, while others support lower speeds or zero-RPM operation. Confirm the minimum stable speed before saving a curve. For an AIO liquid cooler, configure radiator fans separately from the pump and follow the cooler manufacturer’s pump-control recommendations.
FAQ
1. What Is the Best Fan Curve for a Gaming PC?
The best fan curve for gaming PC builds is one that increases cooling as component temperatures rise without creating unnecessary noise. A reasonable starting point is 30% at 40°C, 50% at 60°C, 75% at 75°C, and 100% at 85°C for a CPU cooler, provided the fan supports those speeds.
However, different processors, graphics cards, and cooling systems have different thermal characteristics. Monitor actual temperatures during gaming and adjust the curve rather than copying these values blindly.
2. Should Case Fans Follow CPU or GPU Temperature?
Case fans should ideally respond to both CPU and GPU temperatures in a gaming desktop. GPU temperature is particularly important because graphics cards can produce substantial heat during demanding games, even when processor temperatures remain relatively low.
If your motherboard cannot use GPU temperature as a control source, consider compatible software that supports combined temperature sensors. A CPU-only curve is still a reasonable starting point when more advanced control is unavailable.
3. Is 100% Fan Speed Bad for Gaming?
No, running fans at 100% is not inherently harmful when they are operating within their manufacturer’s specifications. However, maximum speed usually creates more noise and may provide diminishing cooling benefits compared with a moderately higher speed.
The best fan curve for gaming PC configurations should reserve maximum speed for situations that genuinely require additional cooling. Check temperatures, noise, and fan stability before deciding whether maximum speed is necessary during normal gaming.
4. Should I Use BIOS or Software to Control PC Fans?
BIOS is generally the simpler choice for CPU and case fan control because motherboard settings remain active outside Windows. It is suitable for users who want straightforward automatic cooling without depending on a background application.
Software provides additional flexibility when you want case fans to respond to GPU temperature or combine multiple sensors. MSI Afterburner can control supported desktop GPU fans, while motherboard utilities and dedicated fan-control applications offer additional options. Choose the method that supports your hardware and required sensors.
Final Thoughts
The best fan curve for gaming PC builds is not necessarily the most aggressive one. Start with separate CPU, GPU, and case fan settings, verify minimum operating speeds, and monitor temperatures during demanding games. Make gradual adjustments until you achieve a practical balance between cooling performance, airflow, and acceptable noise.
More from Amazon
Programs that pair well with the guide above. Offers and eligibility are set by Amazon and may change.
Free shipping on eligible items, Prime Video and more. Eligible new members can start with a free trial.
Start a Prime free trialAd-free music streaming. Eligible new subscribers can start with a free trial.
Try Music Unlimited freeA Prime membership for ages 18-24 with a trial period. Eligibility is set by Amazon.
See Prime for Young AdultsAudiobooks and podcasts to listen to on the go. Eligible new members can start with a free trial.
Try Audible freeAs an Amazon Associate we earn from qualifying purchases.